Weaving Hints & Tips
How to Read a Weaving Draft
Drafts for weaving contain three parts
- Threading draft
- Tie-up
- Treadling sequence
Together they show how to thread the heddles, tie up the treadles, and weave the fabric row by row.
Threading Draft
The Threading Draft shows the order for threading the warp ends in the heddles. It is always written horizontally with one row for each shaft (harness).
When the loom is threaded ready to weave and you are sitting at the loom holding the threading draft, the threading and the draft match. No matter how the loom got threaded, the left side of the draft matches the left side of the threaded heddles. Shaft 1 is closest to you and shaft 4 is farthest away.

The usual way to read the draft is from right to left, starting from the tie-up corner, but it can be read in either direction.
The yarns are threaded one at a time through the shafts. The numbers 1, 2, 3, 4 in the threading draft merely refer to the shaft number and could be replaced by symbols or by letters indicating colors.
Repeats are shown by brackets. The draft above shows that 12 warp ends are to be repeated a total of five times before proceeding. The total number of warp ends shown here equal 77.
Tie-Up
At the right corner of the draft, the intersection of the threading draft and the treadling sequence, the Tie-Up shows which shafts (aligning with threading draft) are tied to each treadle (pedal). Each vertical colum of the tie-up and treadling sequence shows one treadle.
The Os in the tie-up show that the shaft rises when the treadle is pressed. Thus the first treadle on the left in the draft below lifts both shafts 1 and 2, the next treadle lifts shafts 2 and 3, and so on.

Sometimes tie-ups show Xs rather than Os. Xs show that the shaft sinks when the trealde is pressed. One way to remember this is the bubbles (O) float and anchors (X) sink. To convert a tie-up with Xs to one with Os, add an O to each open square. Together the Xs and Os fill all the squares of the tie-up.
Treadling Sequence
The Treadling Sequence is the block of vertical columns at the right side of the draft. It shows the order to press the treadles to weave the fabric row by row.

Some treadling sequences are written downward from the tie-up (like writing a grocery list), but the tie-ups in Weaver’s Craft are written upward because each row woven on the loom is placed above the previous row.
In the draft shown above, starting at the tie-up and reading upward line by line, the first row is woven by pressing the fifth treadle from the left. The second row is woven by pressing the sixth treadle. These two rows are repeated, and the following row is woven with treadle 1.
Brackets
Brackets are used to shorten the written information by showing repeated sections. Complete the total number of repeats for each bracket before proceeding. In the draft below, brackets enclosing 4 warp ends each are repeated 5 times each. Each bracket shows a total of 20 ends.

Brackets may be nested with smaller brackets within larger ones. Always complete the smaller brackets with the number of repeats shown before proceeding. When the end of the larger bracket is reached, go back to the beginning of the larger bracket for the next repeat, remembering to repeat each of the smaller brackets inside as well.
In the draft shown below, a larger bracket with 7 repeats encloses two smaller brackets separated by 4 warp ends. One repeat of the larger bracket shows 44 ends and the entire threading draft shows 325 ends.

Floating Selvedges
Floating Selvedges are the final warp end on each side of the fabric allowed to float rather than be threaded through a heddle. They are woven in plain weave by manipulating the shuttle as it enters and exits the shed. The easiest way to weave them is to push the thread down with the tip of the shuttle when entering the shed and allowing the shuttle to exit beneath the thread at the opposite side. Each row is woven this way, over upon entering the shed and under upon exiting (in alphabetical order).
Some threading drafts indicate that the first and last warp ends are to be converted to floating selvedges. This simplifies the calculation for the total number of warp ends.
If desired, the floating selvedges may be woven under/over on every row, holding down the final thread as your hand waits to receive the shuttle. For some weave structures, floating selvedges may be woven over/over on one row and under/under on the next.
Warp Color Order
The Warp Color Order shows the placement of color for each warp end in the threading draft. It matches the threading draft, left side matching left side, etc.
Individual colors are listed at the left side. Follow the order from one side to the other as you wind the warp on the warping board and/or as you thread the heddles.

Weft Color Order
The Weft Color Order is occasionally written like the Warp Color Order, but usually the colors are shown in the Treadling Sequence by a letter corresponding to a color.
Heddle Count
A table is often placed near the draft showing the heddle count, the number of heddles needed on each shaft. Before starting to thread the heddles, double check to make sure there are enough on each shaft, using the center heddles to keep the weight evenly balanced on each side of the shaft.
Use Tabby
Tabby is plain weave interspersed row by row between pattern shots. If all the pattern shots in the fabric were removed, a plain-weave fabric would remain.
In Treadling Sequences, the term Use Tabby means that only the pattern rows are shown. It is understood that each pattern row will be followed by a row of plain weave, usually with a second shuttle wound with yarn matching the warp.
To remember which of the two rows of plain weave to weave next, start the weaving by pressing the left plain-weave treadle when the shuttle is entering the shed from the left. Thereafter, the treadle for the next row of plain weave will be on the same side as the thread leading to the shuttle.
Tips for Catching and Preventing Draft Errors
The information given with the draft allows for several ways to verify its accuracy as well as your understanding of the details. Double-check the draft and all its details to familiarize yourself with it before winding the warp. Sometimes rewriting the draft and treadling in your own way helps as well.
- The total number of warp ends should match your count of the number of ends in the threading draft. The heddle count may also be verified by counting the ends on each shaft in the threading draft.
- Look for departures from the regularity of the pattern. If the threading alternates odd and even threads, two odd ends together or two even threads together probably signals an error.
Weaving for Cutting Apart
Placemats, napkins, and towels are some of the many handwoven fabrics woven as a single length on the loom but meant to be cut into sections later. If you know where you'll want to cut, here's a good way to prepare the place.
After the first piece, weave two rows of contrasting yarn—two rows because the valley between them forms an indentation that’s easy to follow with a scissors. Plain weave provides a clear path for cutting, although any two treadles that lift opposite shafts work well.
When you are ready to separate the pieces, stitch on top of the first yarn of each section, next to the contrasting yarn. Stitch up one side, turn the fabric, and stitch down the other side of the contrasting pair. Stitching before cutting prevents the last rows of each section from loosening.
Use a zigzag or straight stitch. If you choose a zigzag, set its width so that it encloses only one yarn and sew with that yarn centered in the presser foot opening. If you choose a straight stitch, set the length slightly shorter than the number of ends per inch so that the needle pierces every warp end as well as the weft that the stitching follows.
For a firmer edge, stitch again next to but not on top of the previous stitching.
When you cut between the two contrasting yarns, these rows ravel out, but bits of them may stick if the yarn is caught by the sewing machine needle. If you’ve sewed evenly, they ravel out easily leaving a clean edge with a very tiny fringe that helps taper the cut edge.
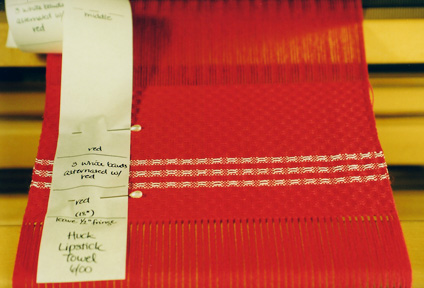
Making a Weaving Guide
Use a weaving guide for each of your projects to make weaving more enjoyable.
A weaving guide is a strip of cash register paper marked with the weaving measurements and pinned to one edge of the fabric on the loom. You can buy rolls of cash register tape at office supply stores.
To make a weaving guide, calculate the finished length of the piece, including hems. Then add shrinkage to determine the woven length on the loom. For instance, a towel with a finished length of 28" plus a 1" hem at each end equals 30". Add 10% for shrinkage and the woven length on the loom is 33".
Cut a length of cash register paper longer than the project length, about 40" long for this example. At the beginning end, write the name of the project and the date. Then draw a starting line. Measure 33" and draw an ending line.
Attach the weaving strip to one side of your weaving with two long pins, about 4" apart. Leapfrog the pins as you weave, taking out the first pin and re-pinning it close to the fell of the cloth while the other pin keeps the strip attached to the weaving. Both ends of the strip are unattached. If the strip is very long, wind up one end and fasten it with a paper clip. When you're finished with the weaving, roll the strip with the project name and date on the outside, fasten with a paper clip, and keep it for reference for future projects.
There are many advantages to using a weaving guide. Let’s say that you want the two ends of the towel to match. Fold the strip in half, matching the starting and ending line to find the middle of the towel. As you weave, mark the strip with repeats and color changes. During weaving, when you reach the middle of the towel, remove the guide and transfer the marks to the other half of the strip. Reattach the strip and weave to the end of the guide. With very little effort, you've woven a towel with matching ends!
Using a weaving guide for every project allows you to weave faster and with more confidence. It helps ensure that your project turns out the right length and keeps track of your pattern when you mark treadling and color repeats. Once you try a weaving guide, you’ll wonder how you ever wove without it.